How to connect the IP Camera to the Soyal Access Control System?
701 Client Software support any IP Camera:
- 701 Client Software supports multiple IP Cameras
- Capture a picture using IP Camera on an event and save it.
- Upload the picture to [User Card Edit] for Identification using the captured picture by IP Camera
- Automatically capture user pictures while enrolling This can be used for events too.
701 Client software of the soyal system can Connect TO 2 IP CAMERAS by editing the registry.
How To Connect IP Camera to the Software:
Use “Regedit” on your PC to enter the Windows Registry editor.

Enter Soyal Client Software as bellow
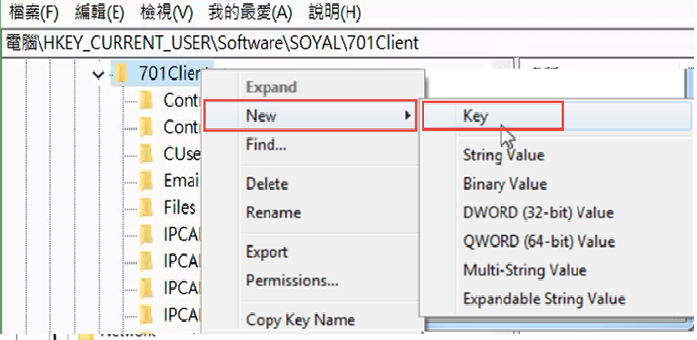
Step 1. Go to HKEY-CURRENT_USER > SOFTWARE > 701 Client.

Right-click on 701Client as shown in the picture and select [New] > [Key]. Please create a new Value Folder and rename it to IPCAM0.
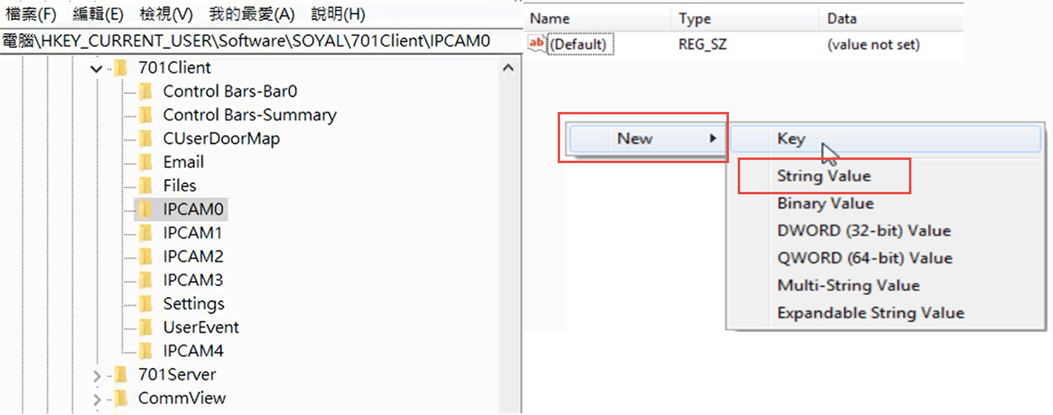
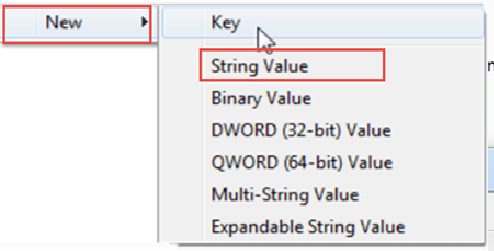
Step 2. After successfully creating the [Key] and renaming it to IPCAM0, right-click and select [New] > select [String Value]. Please See the below Pic.
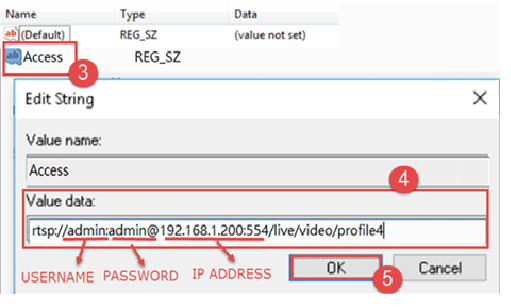
Step 3. Rename the String Value to ‘Access’ and double-click to edit the value data.
Step 4. Insert the RSTP URL of the camera to connect it to 701 Client software. The RSTP URL will seem like in the picture, for more details please CLICK to read more on RSTP.
Step 5. Click ‘OK’
Step 1. Right-click and select [New] > select [DWORD (32-bit) Value]
Step 2. Rename the Value into DOOR and double-click to edit. Select Value Data 1 (for DOOR NO 1 ) & so on and click OK.
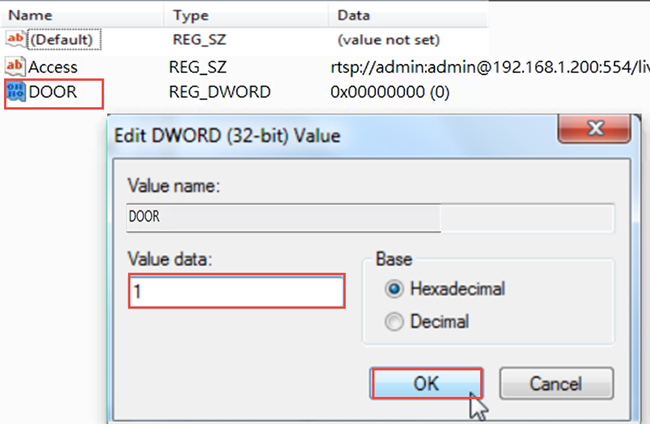
Step 1. Right-click and select [New] > select [DWORD (32-bit) Value]
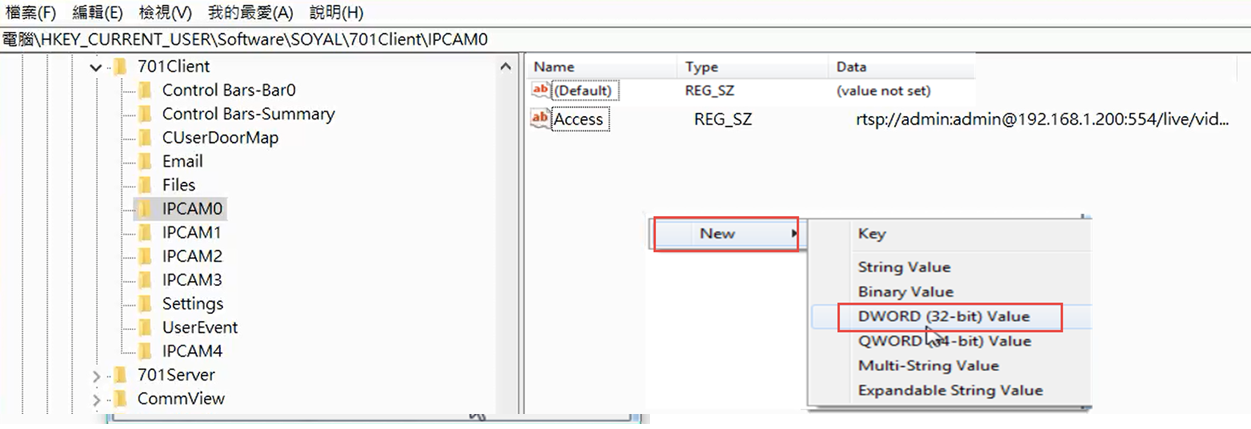
Step 2. Rename the Value into NODE and double-click to edit. Select Value Data 1 (for NODE ID 1) and click OK

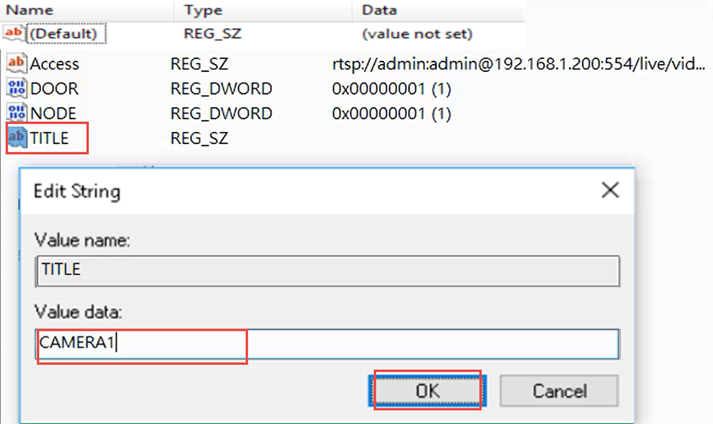
Step 1. Select [New] > select [String Value].
Step 2. Rename the String Value into ‘TITLE’ and double click to edit the value data into CAMERA1 and click OK.
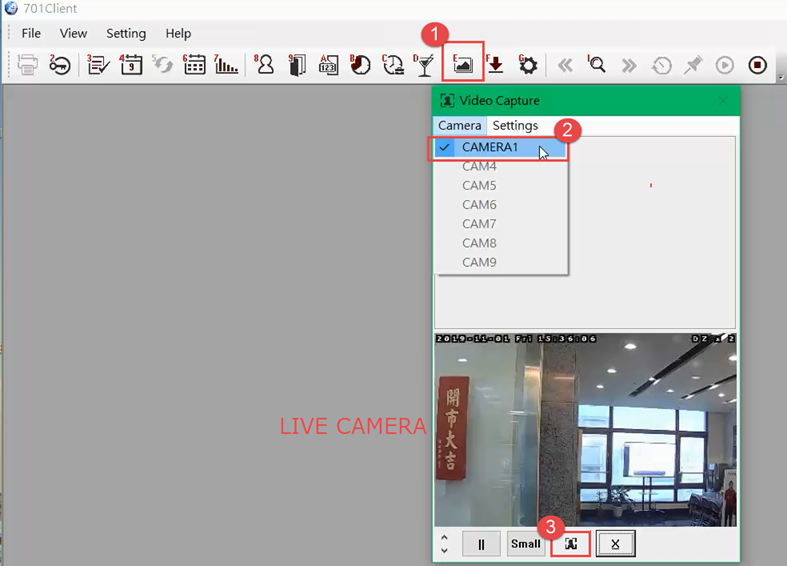
Step 1. Open 701 Client Software and select [E User Picture]
Step 2. Select which camera you want to choose for capturing.
Ps: Sometimes the live camera is lagging, Please adjust your Camera frame rate FPS and quality
Step 3. Click on the capture logo.to capture live images.
Step 4. Select the location to save the captured picture.
How to Upload a picture to [User Card Edit] using a captured picture by a Connected IP Camera?
Step 1. Select [8 User Card Edit]
Step 2. Double click the QRCode (it will be between QRCode or User Picture to be displayed)
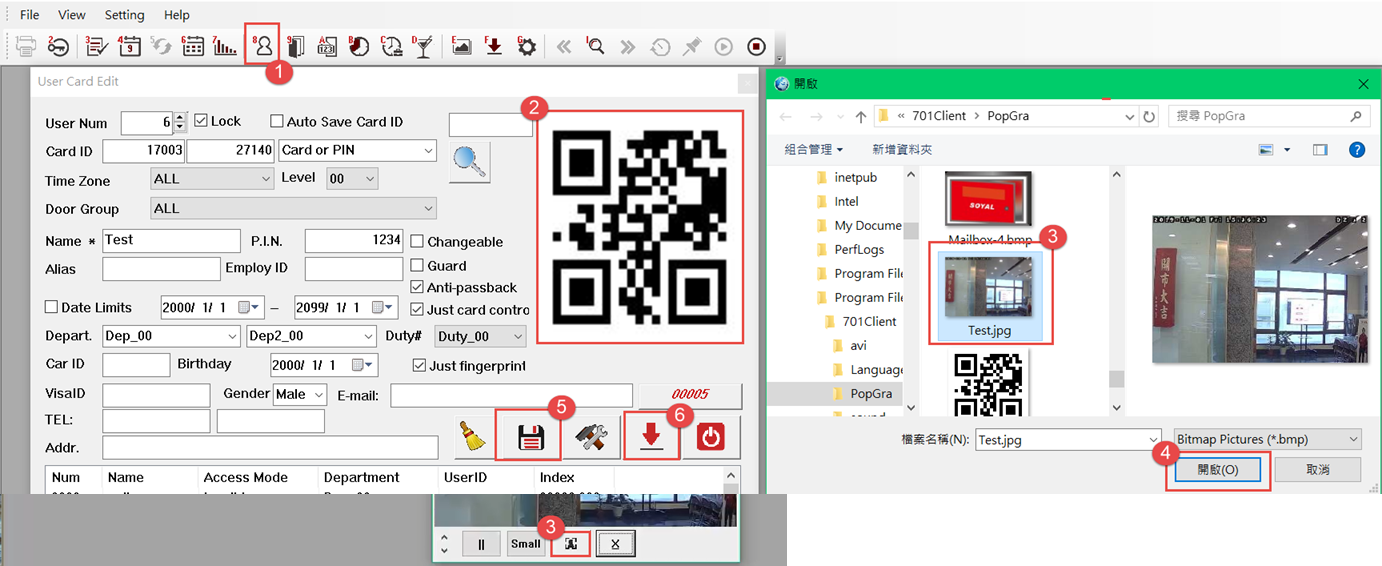
Step 3. Select the picture that you want to set as the user picture. You can choose the picture from the captured picture using an IP Camera that has been saved to your PC
Step 4. Select ‘OPEN’
Step 5. Select ‘SAVE’
Step 6. Select ‘DOWNLOAD’


