

How to Setup & Initialized Dahua Security System
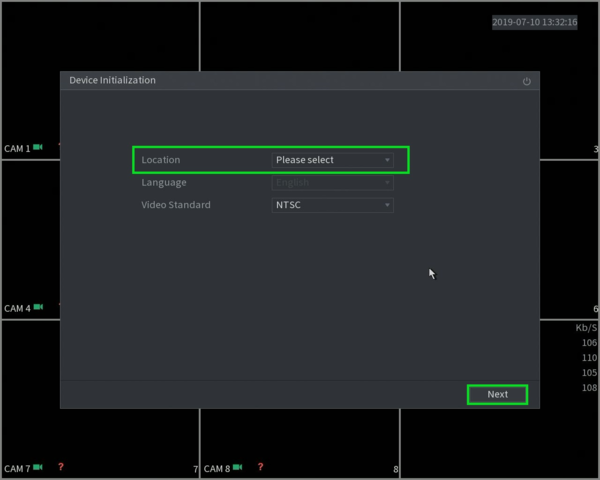
Turn Power ON the NVR/DVR or any Dahua recorder, choose “United States” from the region settings drop-down menu, or select your country, your Preferred Language, and video Standard, and click “Next.”
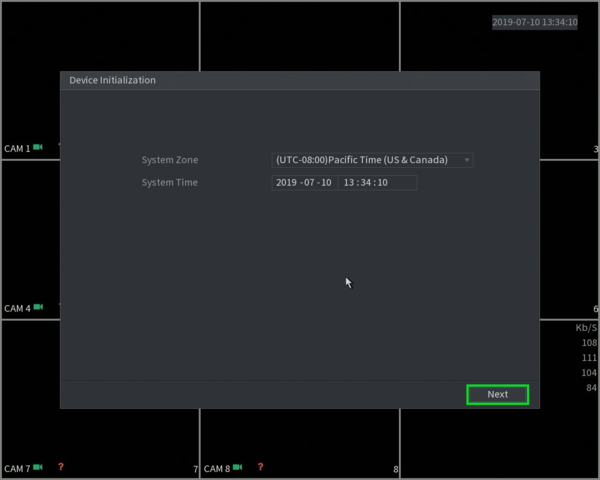
Once you click Next, it will ask you to select Time Zone.
Choose the proper time zone setting and set the Date and Time for your region. this setting can be done manually in further stages or configured by an NTP server to keep date and time synchronized.
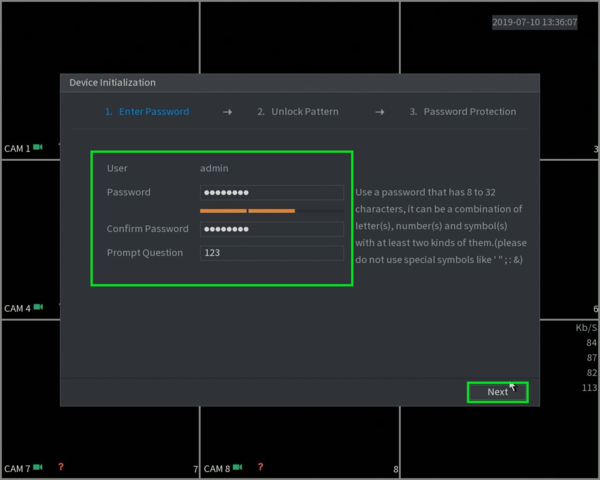
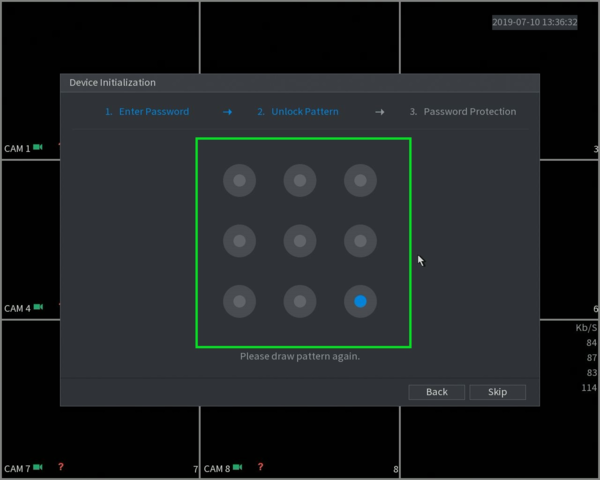
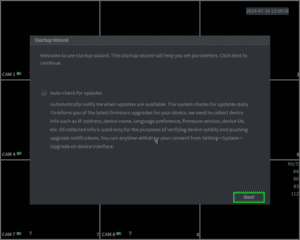
After Clicking Next, You will asked to input a password for the admin account and pattern setup to unlock the system instead of a password. unlock Pattern can be skipped.
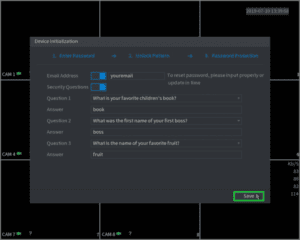
Click Next to set security questions and email.
To reset the admin password in case you forget it, you can enter your email address. This allows you to receive instructions on how to reset the password. Additionally, you can set up security questions as an alternative method for password recovery. This provides an extra layer of security and ensures that you have multiple options to regain access to your account if needed.
“Resetting the password for XVRs and NVRs can only be done using this method. If you skip this step and forget your device’s password in the future, you will never be able to reset or recover your password, you need to change your device.”
Click Next and make sure all the setting is set as per your requirement. Check the date time and NTP setting if required. Click to change your time format to 24H or 12H.
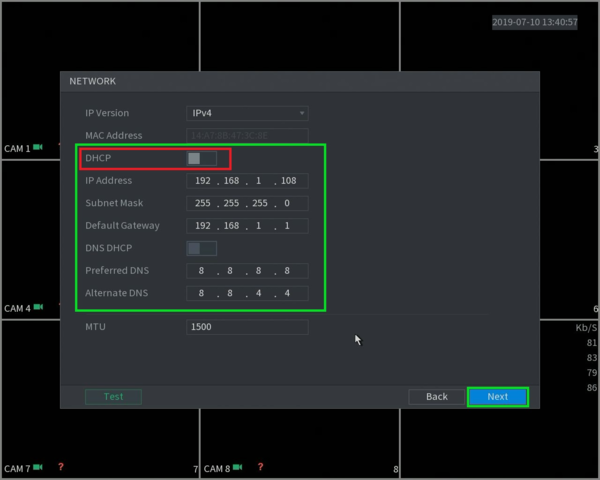
In the Network setting please select DHCP if you’re using a DHCP server or an internet Router by selecting DHCP ON, The Dahua devices will be configured automatically to the network.it is my recommendation to use the Manual Network setting.
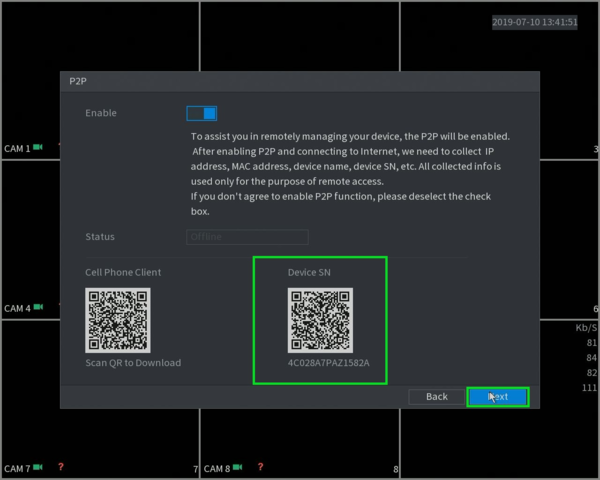
For remote monitoring of your system to your Mobile or PC from anywhere make sure the P2P setting is Enabled and the system shows ONLINE Status. Just Click Next to Finish the initialization of Your System.
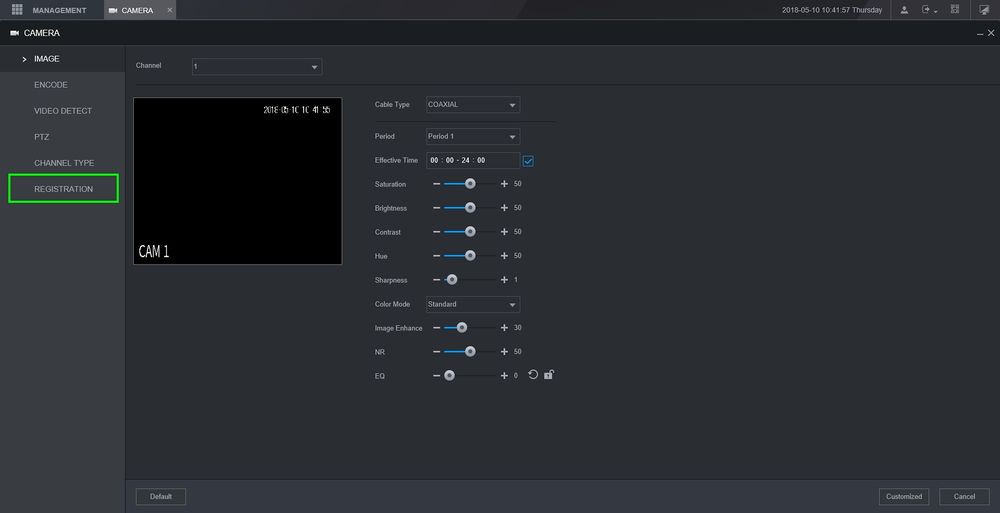
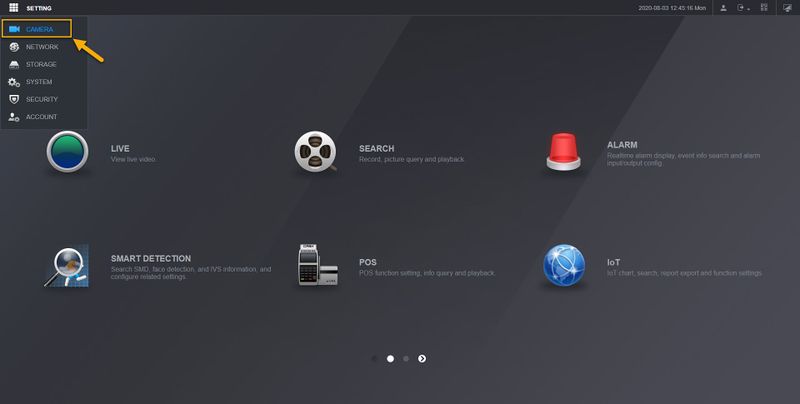
At this stage, your XVR/DVR or PoE Connected NVR is ready to display the connected cameras at their default resolution. Now you can set or edit each camera by selecting the drop-down menu on “Channel”
How To Add an IP Camera To The NVR?
Please follow these step-by-step instructions.
Method 1:
This method is straightforward if cameras have default credentials. We’ll search for devices on the network and add them with a click.
Click on Camera & then Select Registration & Device search. The device search option will scan all the IP cameras connected to your LAN.
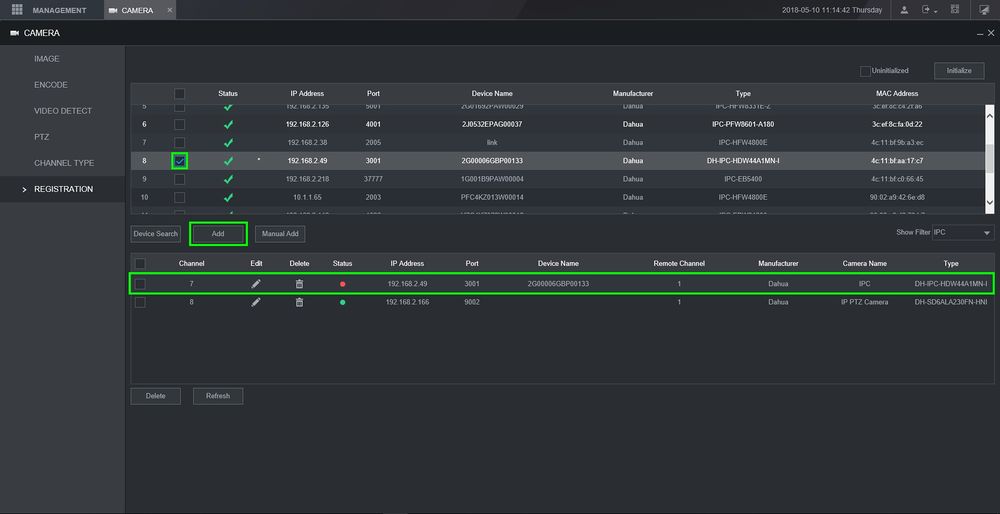
Select the camera that you want to add, to the display, Just click “ADD.” The camera will appear in the lower box.
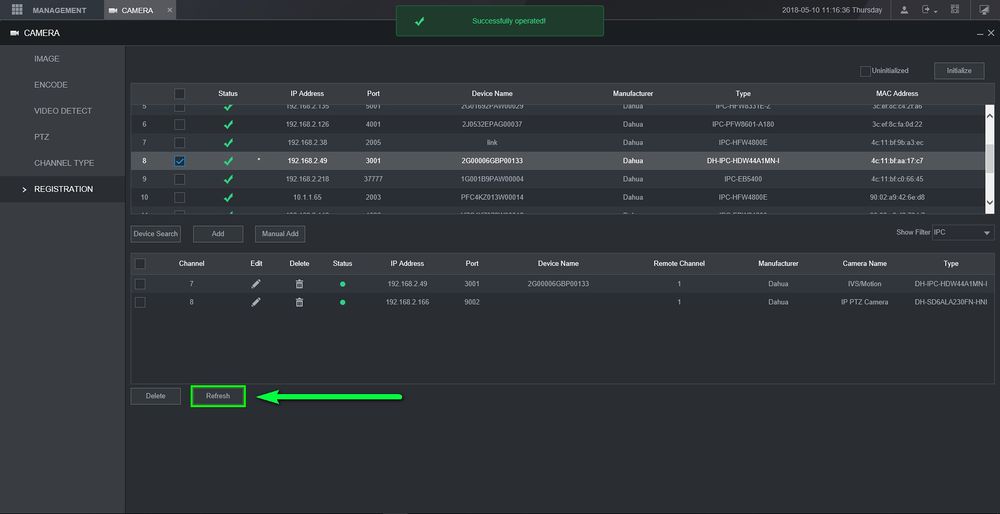
Click “refresh” after a few seconds to confirm. The status light of the connected camera will be green.
If it is RED then check the user name Pass word. In this method, the newly installed camera will adopt the username & password of your NVR by default.
Method 2:
The second method is used when an existing camera has had its password changed. To change the password during manual addition, you must first locate the device through a device search like Method 1.
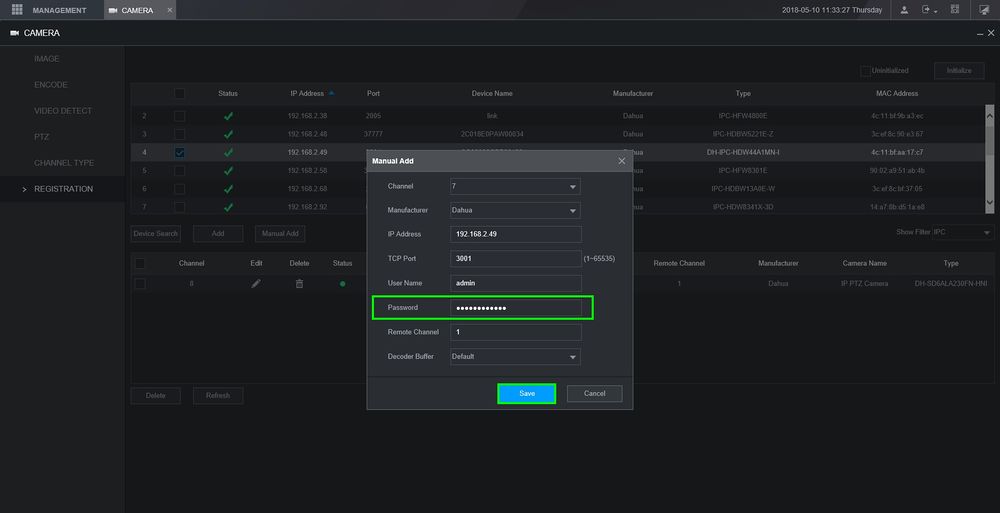 Perform a Device Search to locate the camera, then select “Manual Add.” Input the password and click on SAVE to save the setting & now the camera is added.
Method 3:
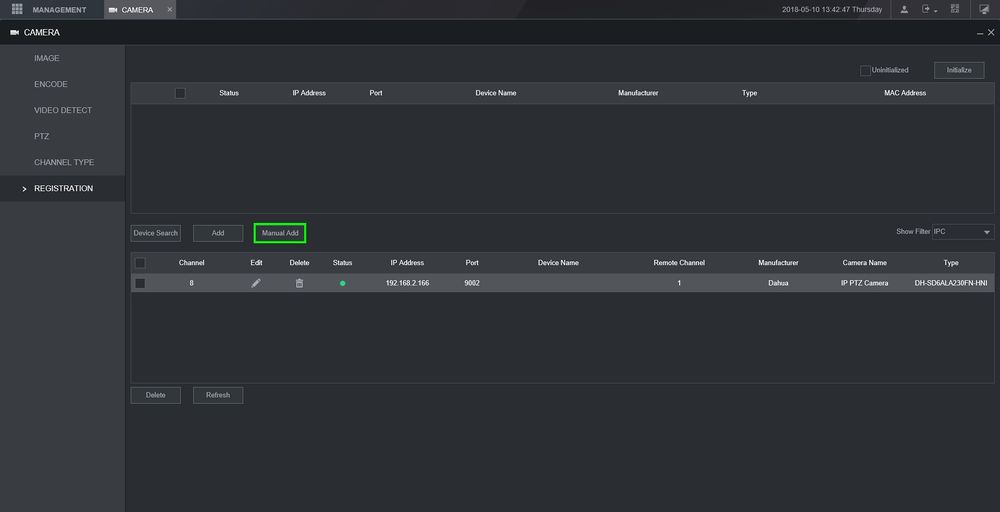
When Device Search fails to locate the camera on the network, you must manually enter its information.
Click on Manual Add
input all the information of connected devices like IP Address, subnet Mask, Password, Port Information, and camera type ONVIF, By manufacturer if available in NVR
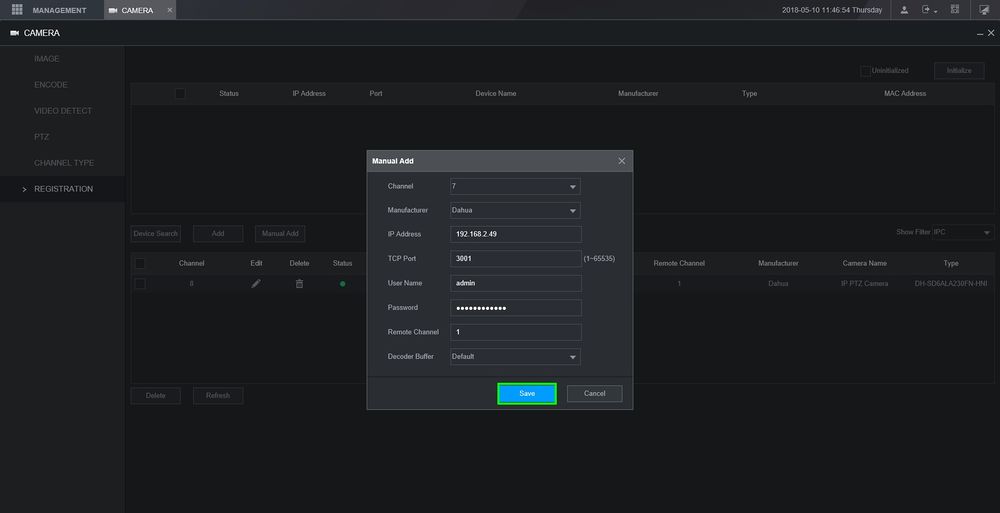
Save the report to add the camera to the NVR Display.
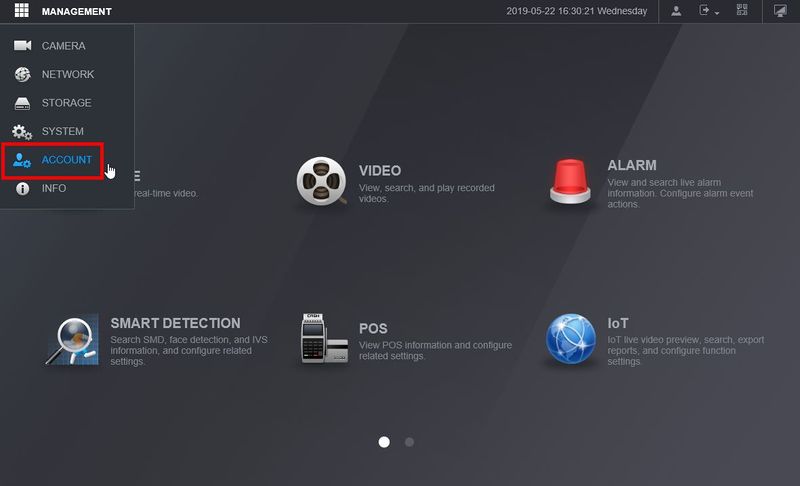
How To Add Users in NVR,DVR,XVR?
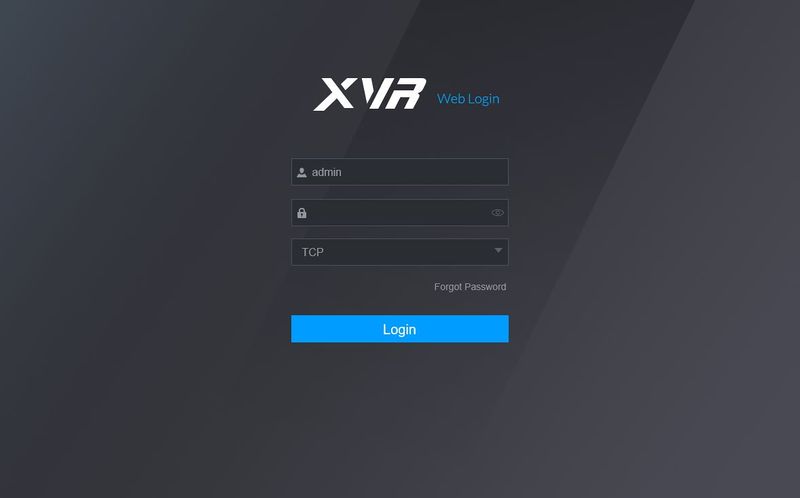
Please log in to access the device’s web interface, by typing the IP Address into the web browser or by using the Dahua Config tool to get the IP Address or log in directly. Just input the Admin Username and password and click Login
Click On Account select Add User and fill the information as required -select the group of added users -select the permissible items
- User Name.
- Password.
- Group – The user can be assigned to a user account group for managing multiple user authorities.
- User MAC – please provide the MAC address for filtering and security purposes.
- Memo – Memo line for notes regarding the user.
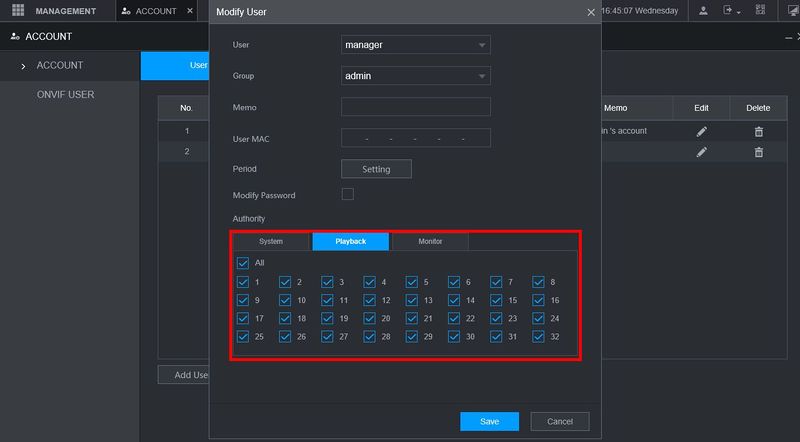
In the Authority menu, you can define the individual rights of a user to use the System, Playback, and Monitor tabs, as well as specify which channels the user can access.
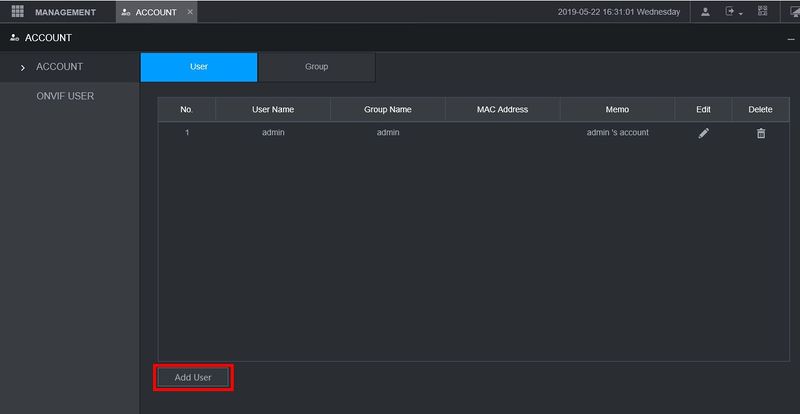


Finally, Click SAVE to save all newly added data for the USER to the system. The user has been created as per your desire.
How To Setup Recording to the Newly Installed NVR, DVR, XVR?
After logging into the NVR/DVR/XVR select Management Menu and then select Storage.
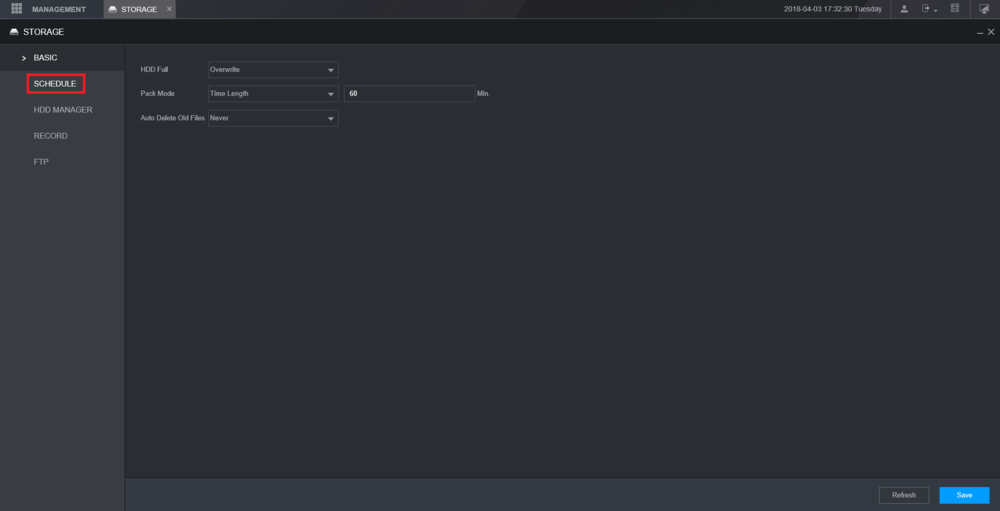
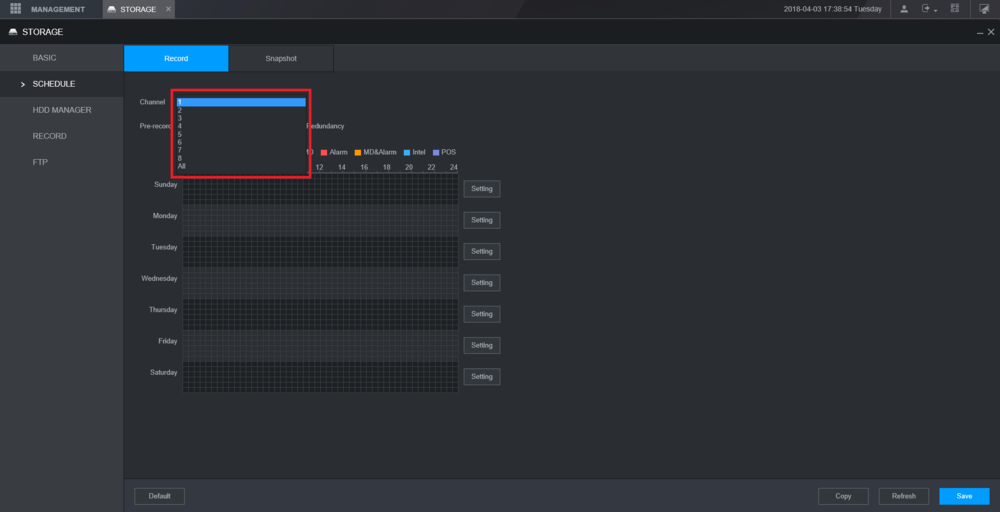
Select the channel from the drop-down menu to adjust its recording schedule. Here we are Discussing General Recording, To access the settings, simply click on the option next to any day of the week..
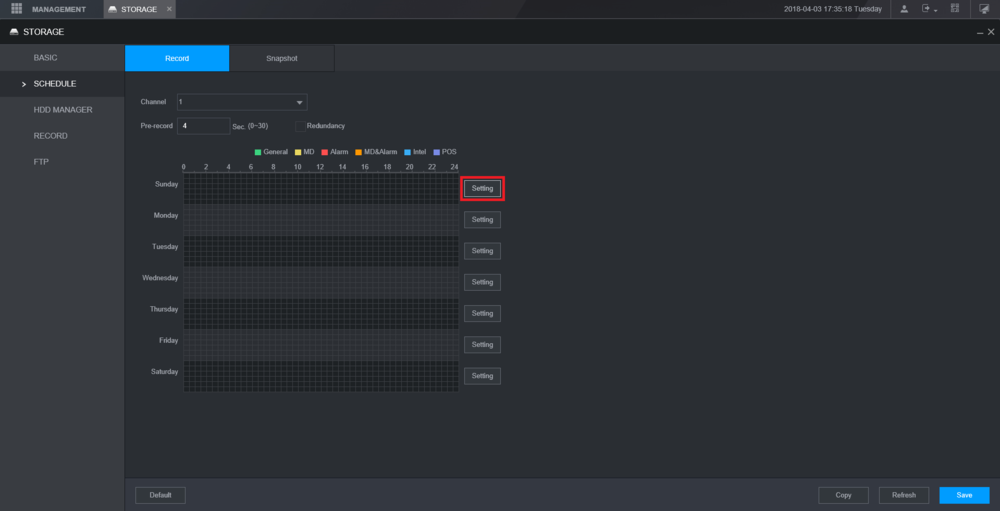
You can choose from a variety of recording options, including General Recording, MD (Motion Detection), Alarm, MD & Alarm, Intel, and POS (Point of Sale). For this tutorial, we will be using General Recording.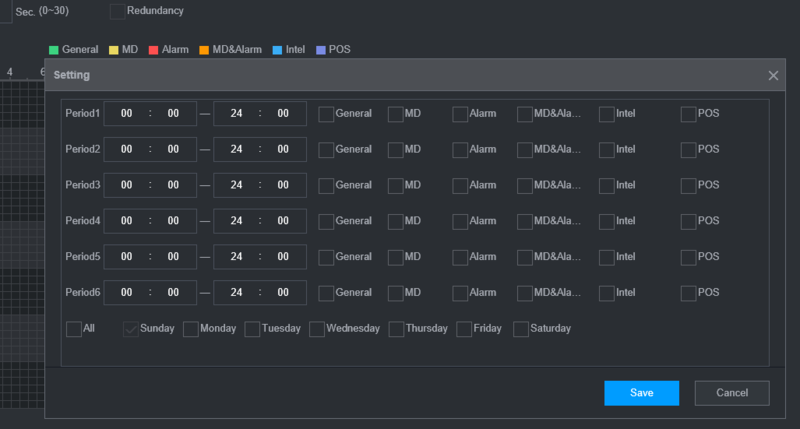
To set a period, you can select multiple periods, but for this tutorial, we will only set one period. Start by checking the “General” box. Then, select the day or days you want to schedule recordings for and click “Save” to complete the process…
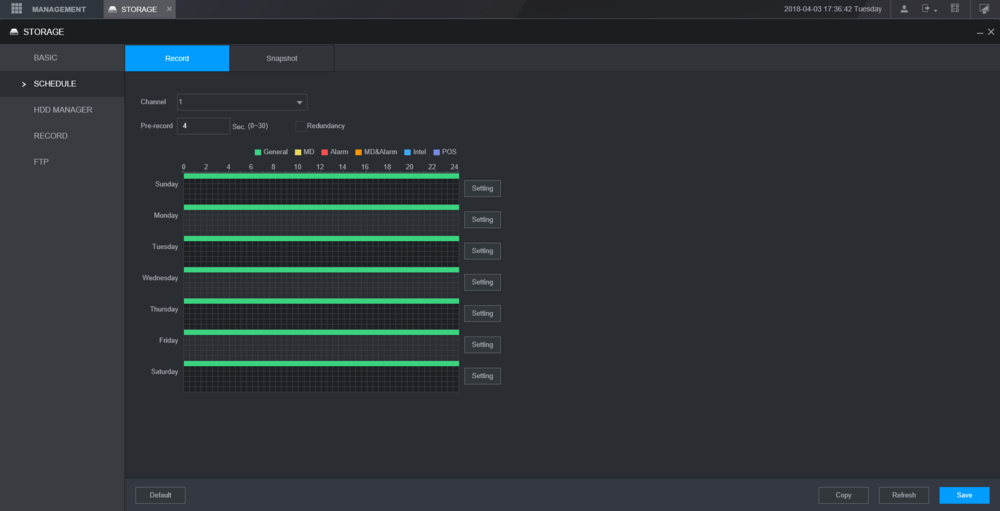
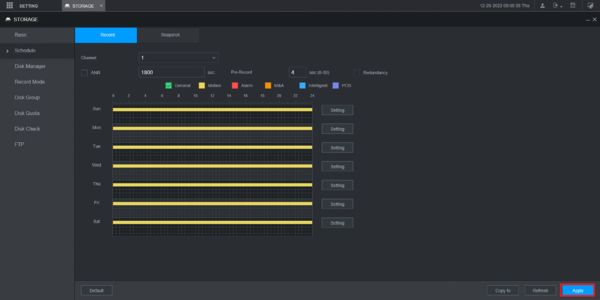
After selecting days from the previous step, green bars will indicate general recording.
You can copy the same schedule to another channel or camera by selecting “Copy” and then “Save” in the Copy menu.
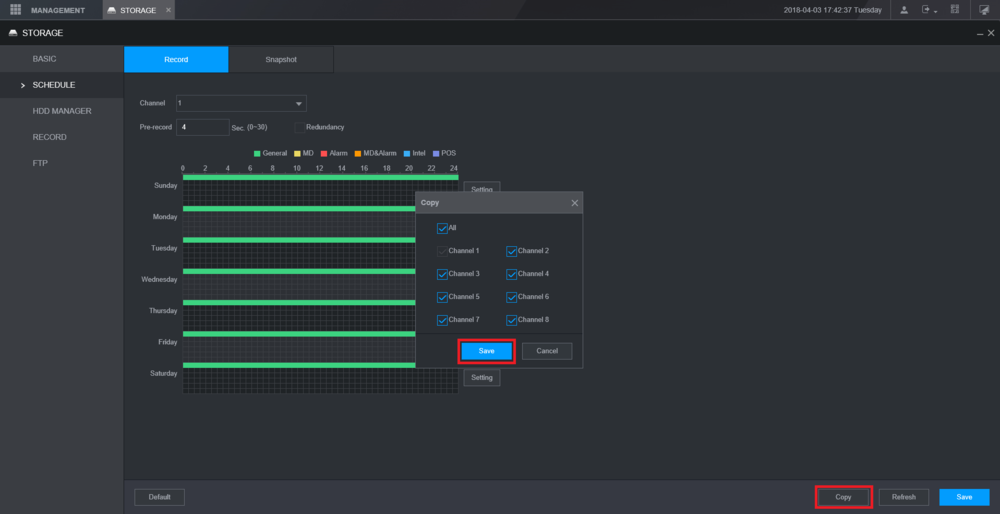
Select “Save” at the bottom to save all settings. You will receive a pop-up notification at the top of the screen if your changes have been successfully saved.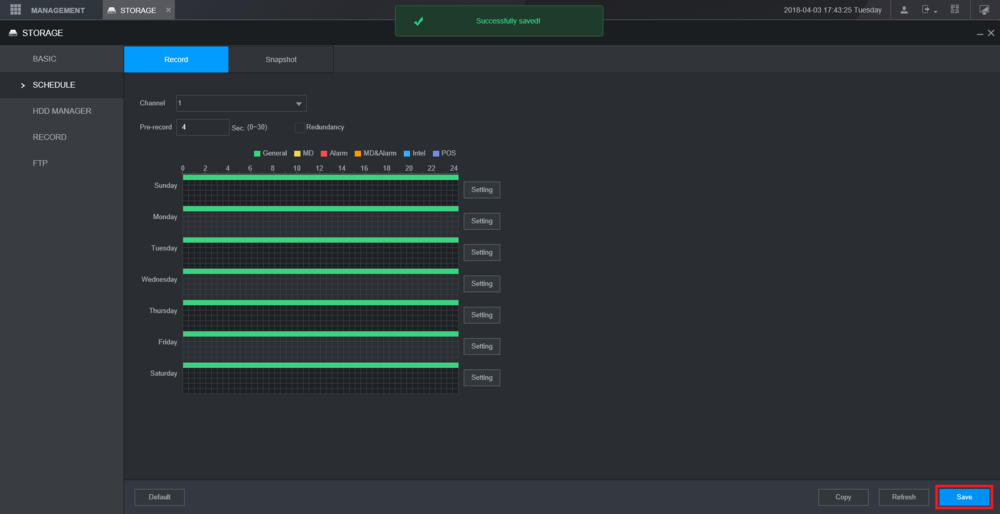
How To Setup Recording Setting On Motion?
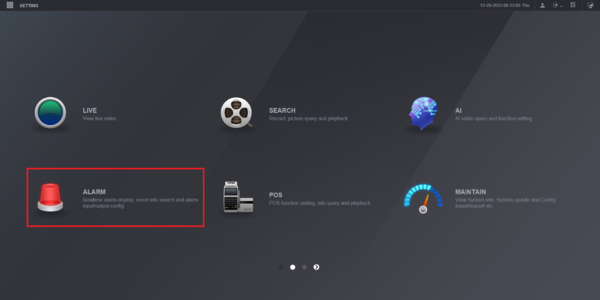
login to the system select management and click Alarm.
To set an alarm, go to the main menu and select the “Alarm” option.
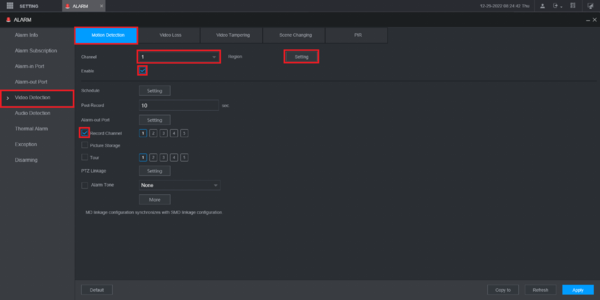
On the left-hand side, select the “Video Detection” option. Then select the Motion Detection tab at the top.
To select the desired channel, click the drop-down menu next to “Channel”.
Check the box next to Enable.
Check the box next to Record Channel.
Click on Setting next to Region
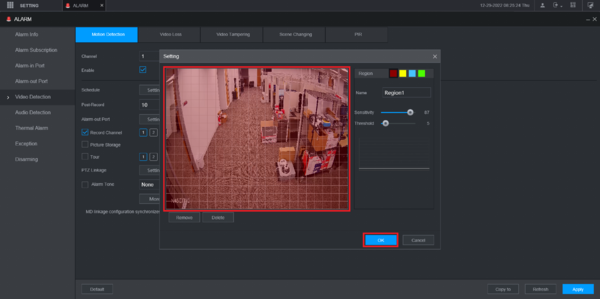 The red Highlighted area is where you want to track motion. it can be selected or unselected as per the desire
Then click OK at the bottom.
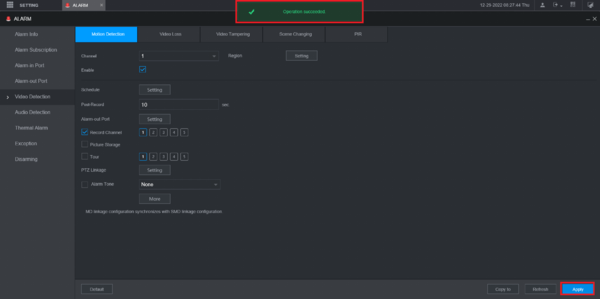
the motion setting can be customized to each camera or copied to all cameras in the same setting, but it is highly recommended to customize the motion setting to each camera as per the scenario.
Click on the Apply button at the bottom of the page. Once your changes have been saved, a confirmation message reading “Operation Succeeded” will appear at the top of the screen.
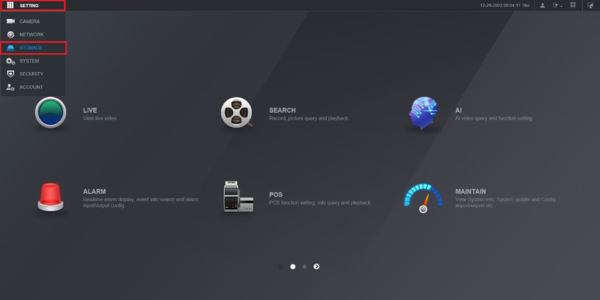
To access Storage, click on the drop-down menu at the top of the screen and select Settings.
Select Schedule on the left, then choose the Record tab. From the drop-down next to Channel, select your desired channel. Finally, click on the Setting button next to your preferred day of the week.
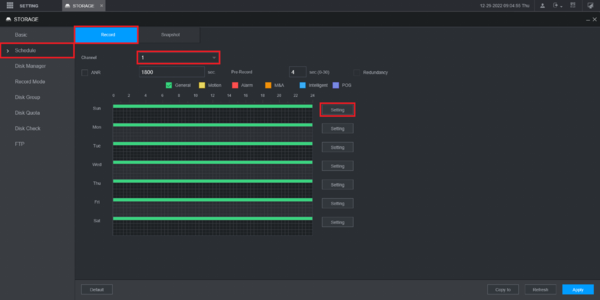
Check the All box to enable all days of the week.
Check the Motion box for “Period 1”.
Click OK at the bottom
Click Apply to save the settings.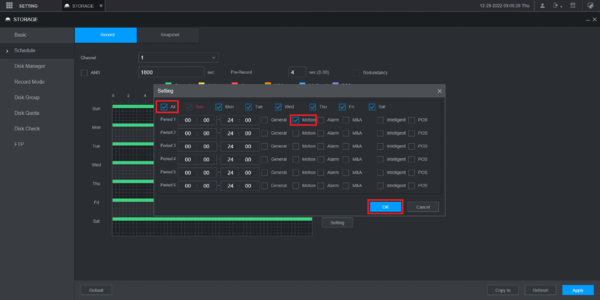
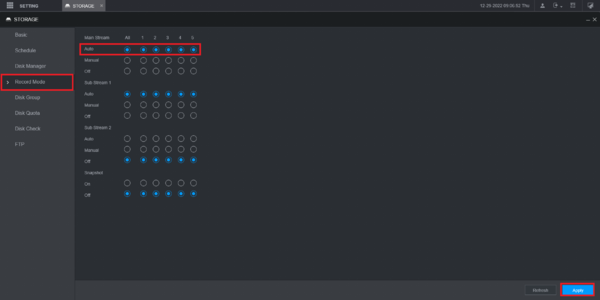
The Record Mode should make sure Auto is enabled for the appropriate channel(s). or can be set manually to record sub-stream too.
Click on Apply at the bottom. to save the settings.
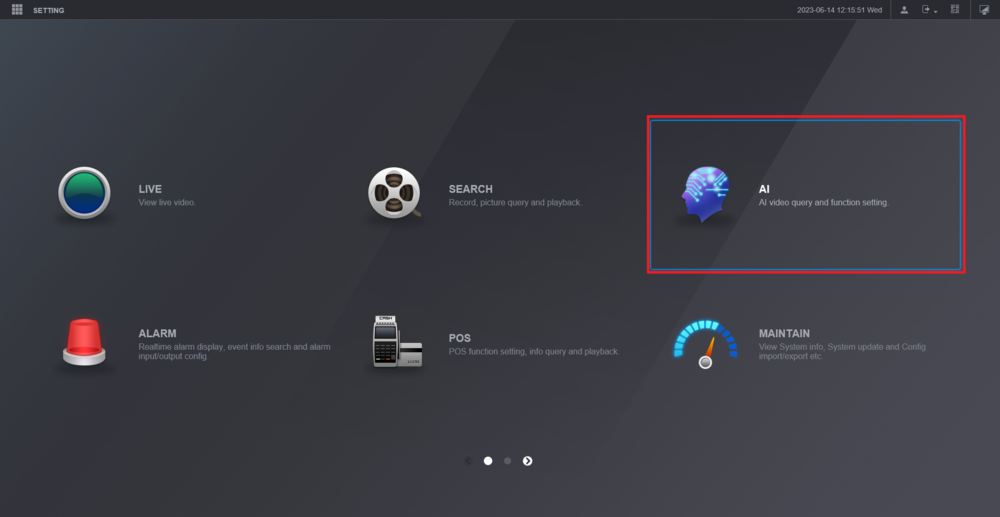
How to set up “Ai” Based Recording in NVR, DVR, and XVR?
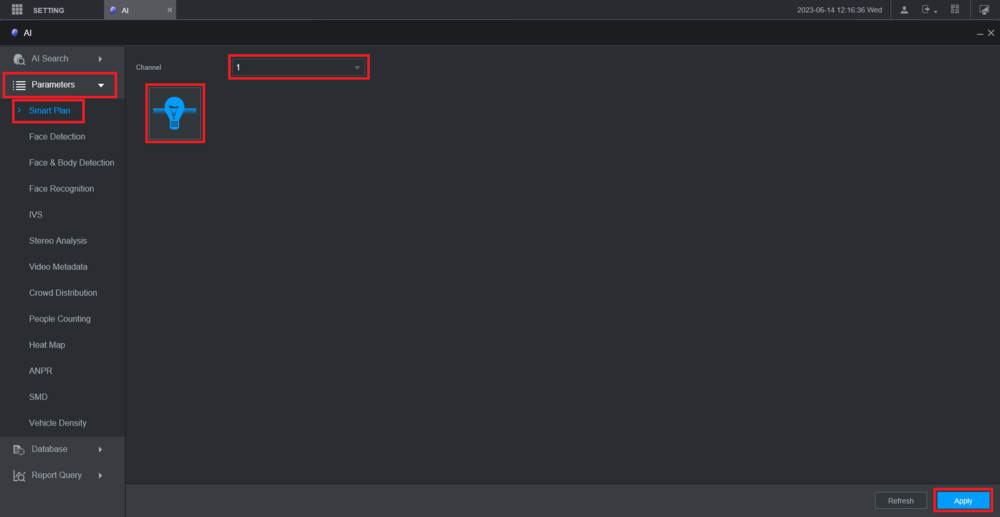
To access the AI feature, simply select it from the Main Menu. Follow the Images First, go to the left-hand side and choose Parameters. Then, select Smart Plan which is located below it. After that, choose the camera channel you want to configure from the Channel drop-down. Look for the IVS “Lightbulb” icon and click on it to highlight it in blue. Lastly, click on Apply located at the bottom to finish the process.
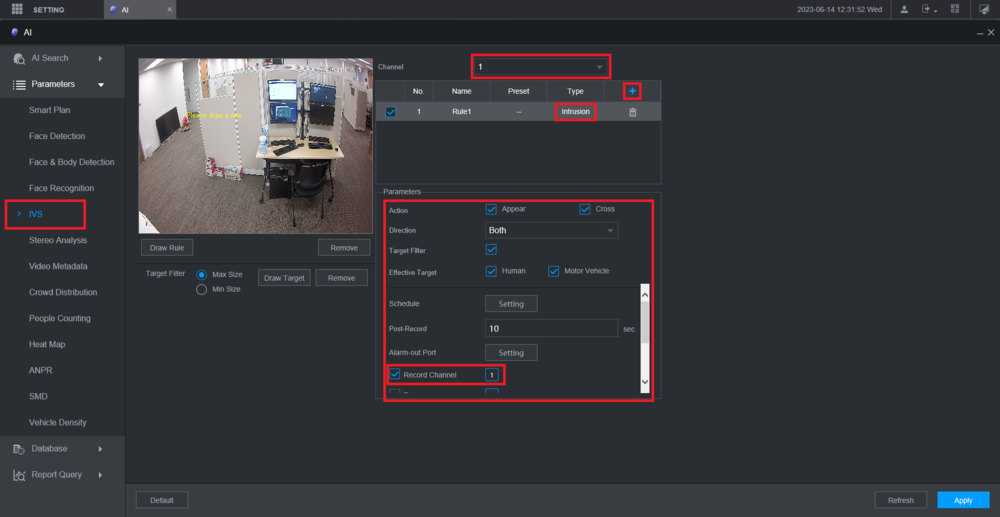
To set up IVS, first select IVS on the left-hand side. Then, choose the camera channel from the Channel drop-down menu. After that, click on the + button. Under the Type column, double-click on the rule type to select the type of IVS rule you want to use. Make sure to adjust all the settings in the Parameters section. Finally, check the Record Channel box and ensure that the camera channel is highlighted next to it.
The setting of one camera can be copied to all are each camera can be set individually as per scene and requirement.
Left-click on the live view to draw a rule. Continue left-clicking to add more segments. Right-click to finish.
Then click Apply at the bottom
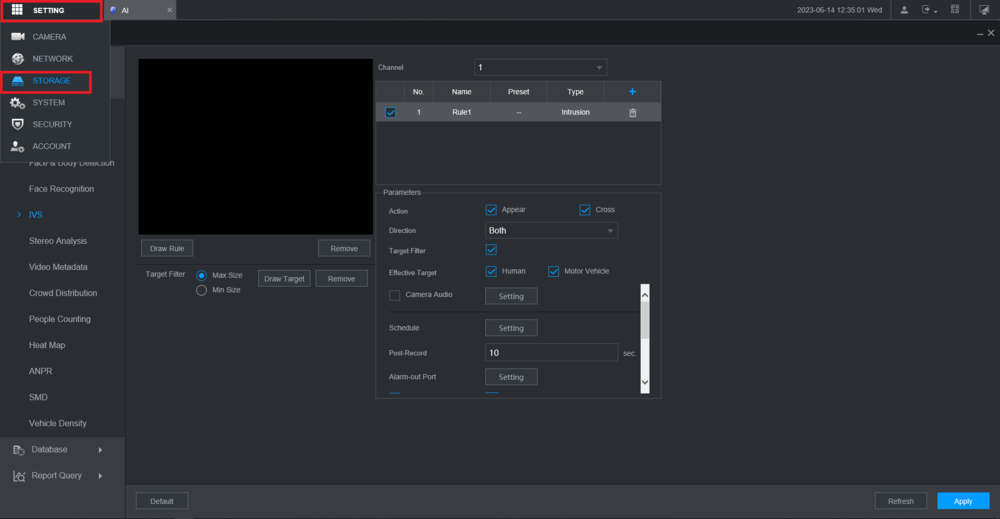
To get started, select the “Setting” option in the upper left corner of your screen. Next, click on “Storage” from the drop-down menu.
Select Schedule on the left-hand side, then choose the Record tab at the top. From there, select the desired camera channel from the drop-down menu and click on the Settings button located to the right of the chosen day of the week.
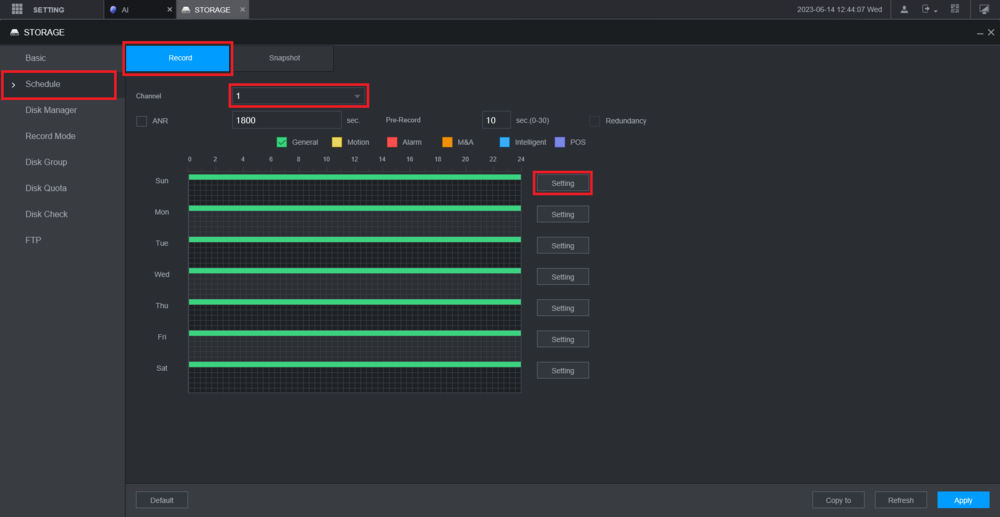
To choose all days of the week, select the checkbox labeled “All”. Also, select the checkbox labeled “Intelligent” located to the right of Period 1. You can adjust the days of the week and the time period for recording IVS events. Finally, click on the OK button.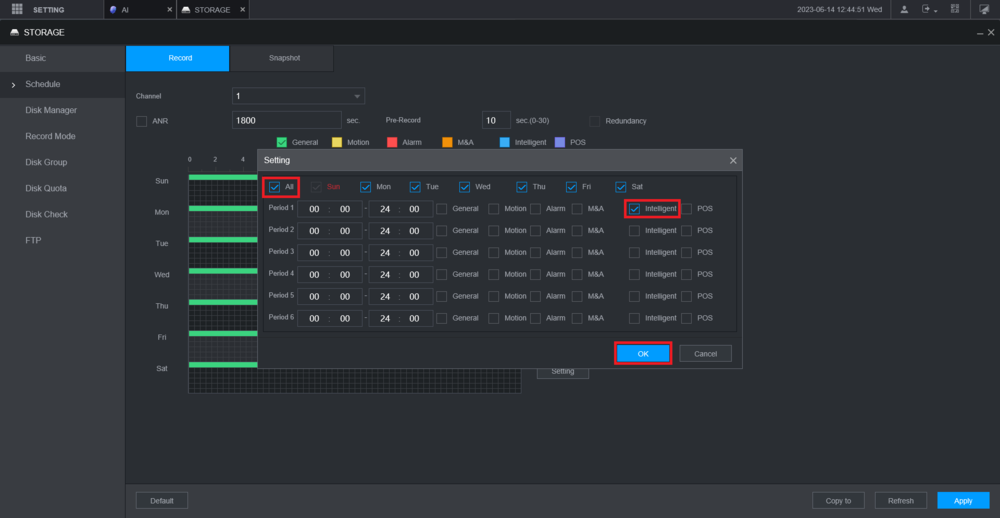
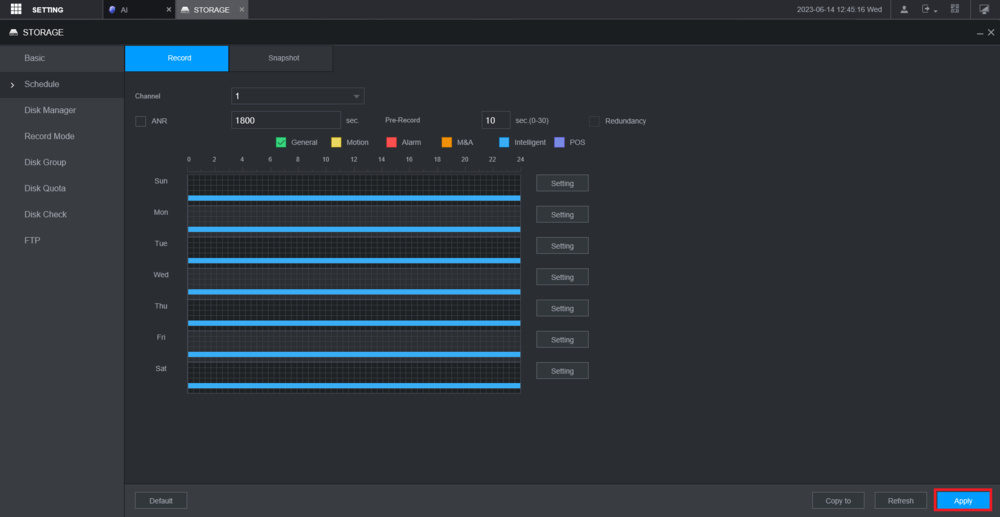
You will see blue bars on the schedule indicating when IVS events will be recorded and triggered. Click “Apply” at the bottom.
How To Do Audio Recording Setup in your NVR/DVR/XVR?
Before Setting up Audio recording First need to enable the audio source.
Enable audio source
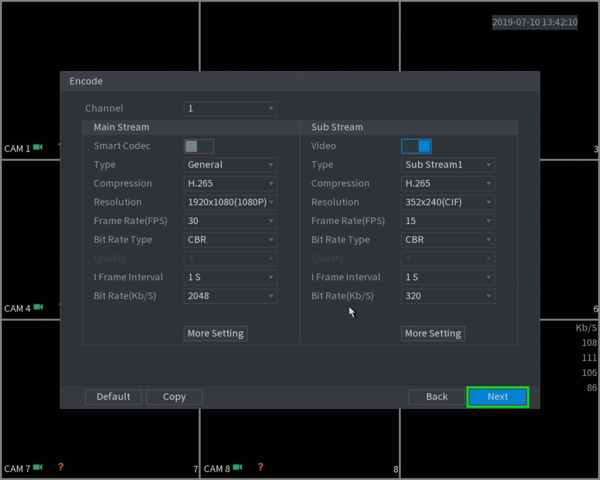
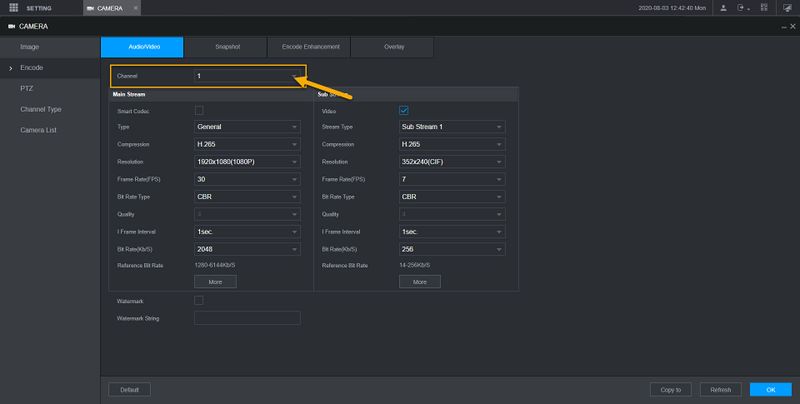
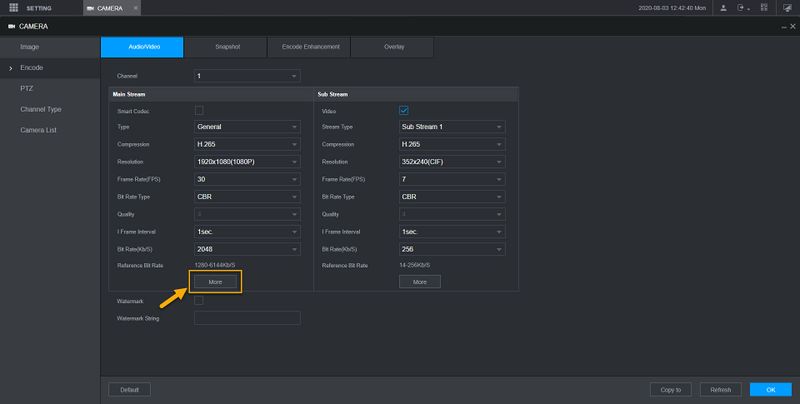
To enable audio source first log in to the system via a web browser by typing its IP address, Clicking on Setting & camera, Click on Encode. Then select the camera channel that supports audio. Click on More and enable audio 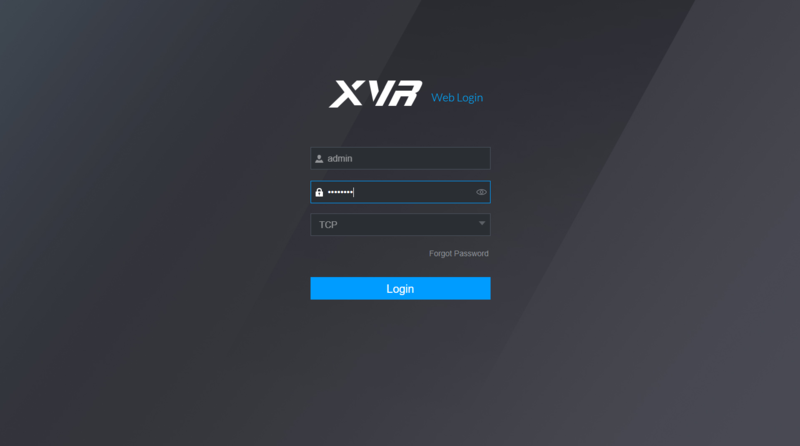
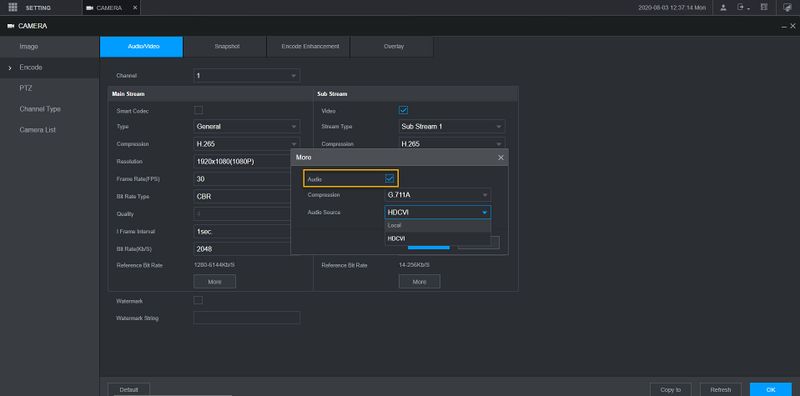
by checking the box.
“Select HDCVI as the audio source if your HD-CVI camera has a built-in microphone. Choose local if you are connecting an external microphone to the recorder”.
save the setting by clicking on save and OK.
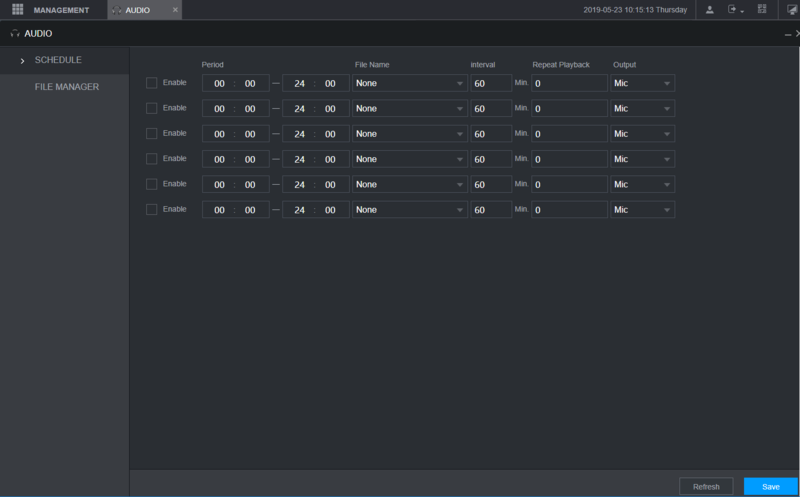
Setu Audio Recording
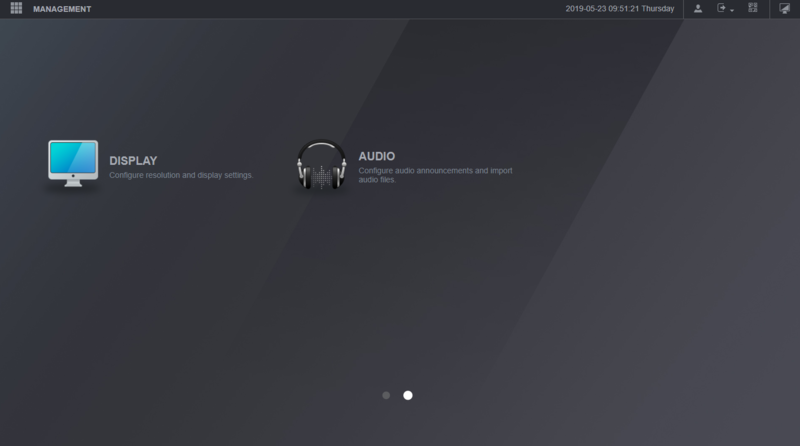
Log in to the management Page of the Recorder by using the IP address, go to the second page of the system Click on AUDIO, and do the settings as required by clicking Schedules & file manager
How to Configure Dahua Security System for Remote Monitoring on Mobile or PC?
by entering the Network setting either from the web browser or directly from the Device, input the IP address, subnet mask, and DNS to get NVR, DVR, XVR, or any other Dahua devices online.
if not familiar with the network details you can use the DHCP setting to allow the system to configure automatically but it is recommended to go with a manual setting for the internet. now go to the P2P Tab to check the system status ONLINE-OFFLINE, if the internet setting on the devices is good the system status will be ONLINE. 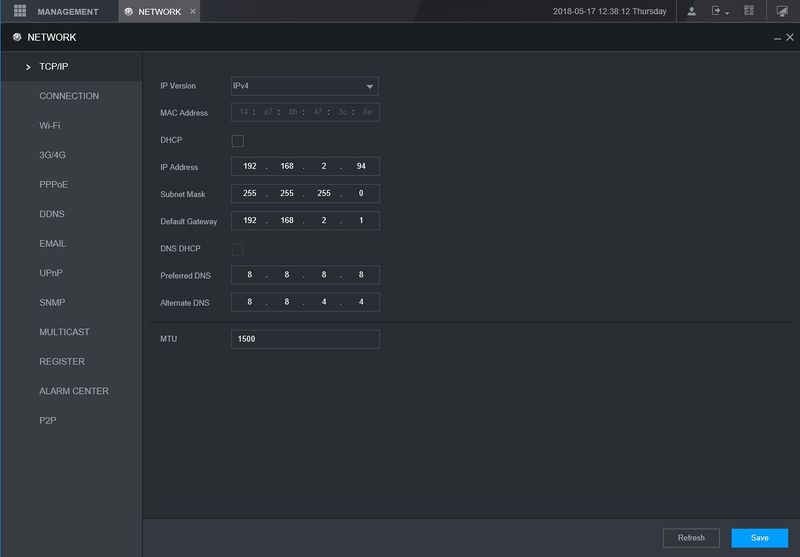

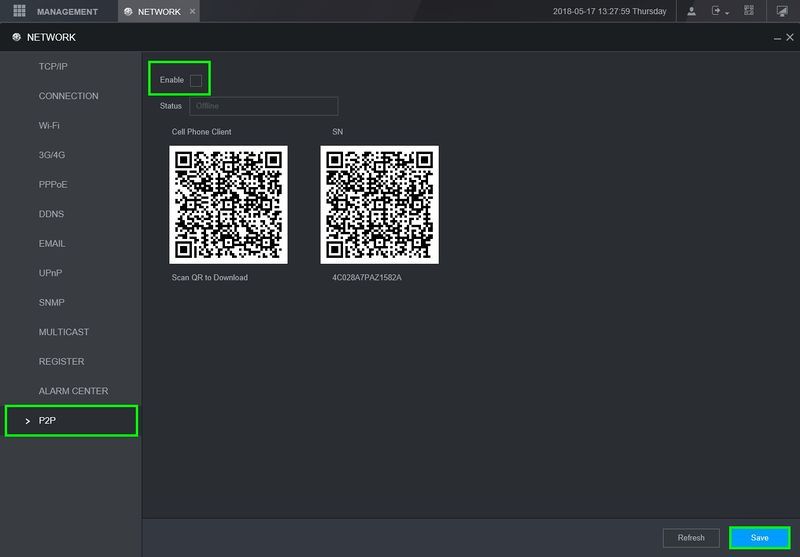
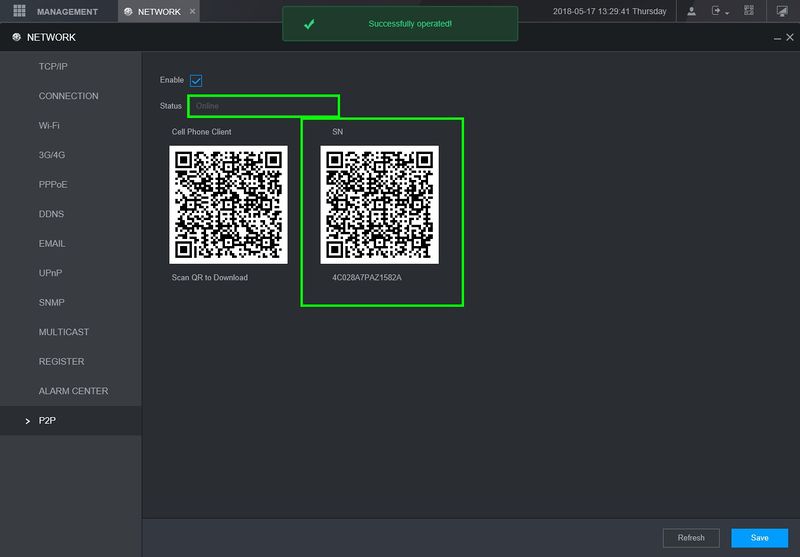 Don’t forget to save the setting to make the system status ONLINE.
If your P2P Status is still not online, try rebooting the device and attempting again. If the problem continues, it may be due to a firewall on the network interfering with the connection to the P2P servers.
To Watch On Mobile
Now download DMSS software on your mobile select the Device click on + to add new devices & select SN/Scan to scan the QR code on the P2P screen of the online devices just input the details along with the user name and password to watch the online device remotely.
To watch On PC
Just install Smart PSS to your computer system, after login to the SmartPSS software Click on the Device Tab,
then Manual Add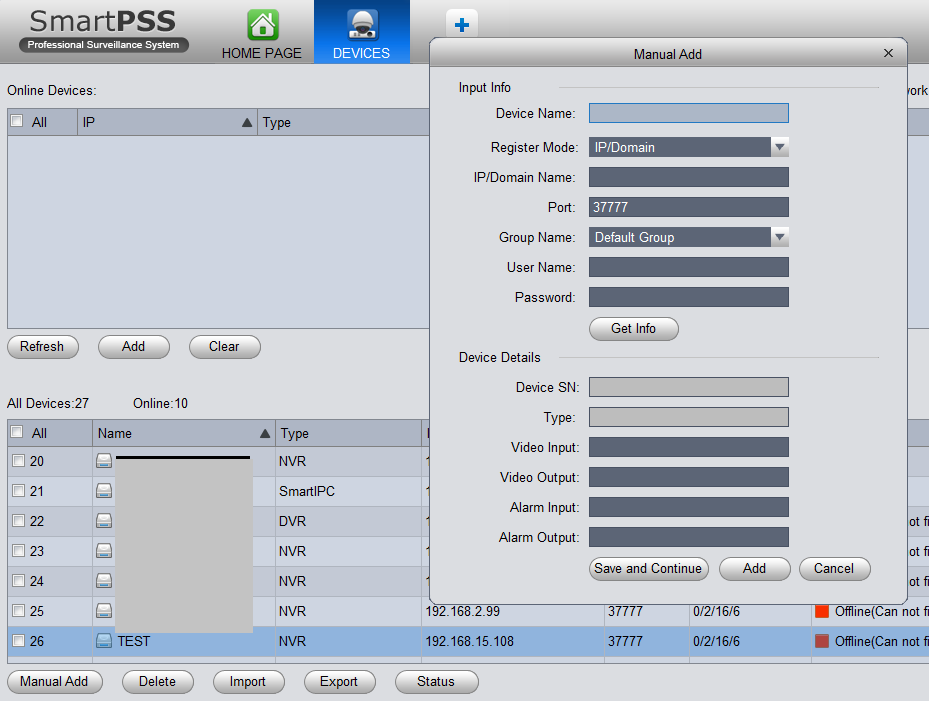

Fill in the information in the Manual ADD Tab click save and continue.
the online system either Camera, NVR, DVR, or XVR will be added & can be now monitored online.
